Create ON-THE-GO — Syllaby Mobile is now live.
Learn how to create a successful YouTube channel with this easy-to-follow guide. From setup to optimization, start your YouTube journey today!
*You can cancel your subscription anytime*


*You can cancel your subscription anytime*
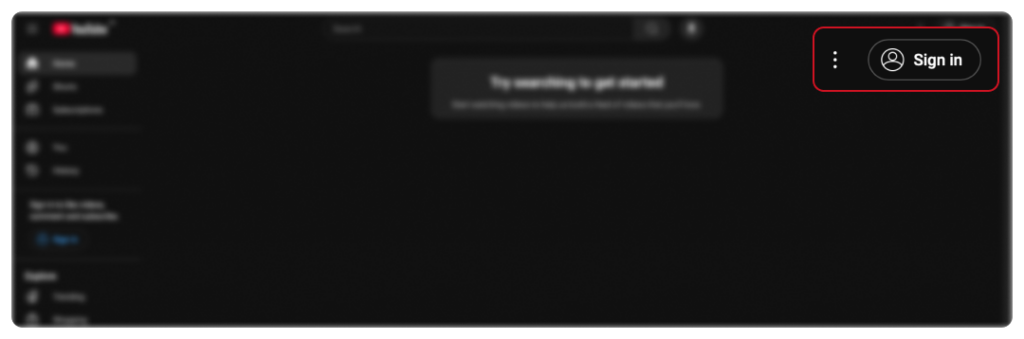
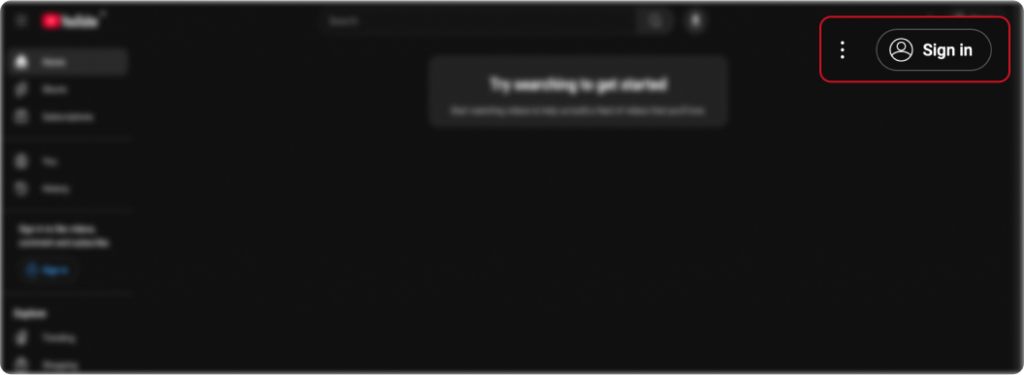
Go to YouTube.com and click 'Sign in' located in the upper right corner of the page. Then, sign in using the Google account
you would like linked to your channel.
At this point, you should now have a YouTube account.
In the upper right corner of the screen, click on your profile icon and then click "Create a channel."

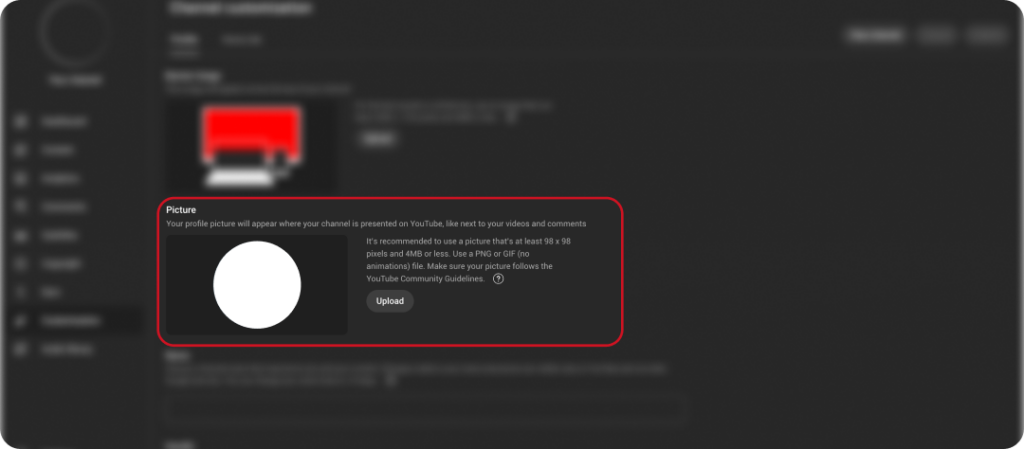
Uploading a profile picture
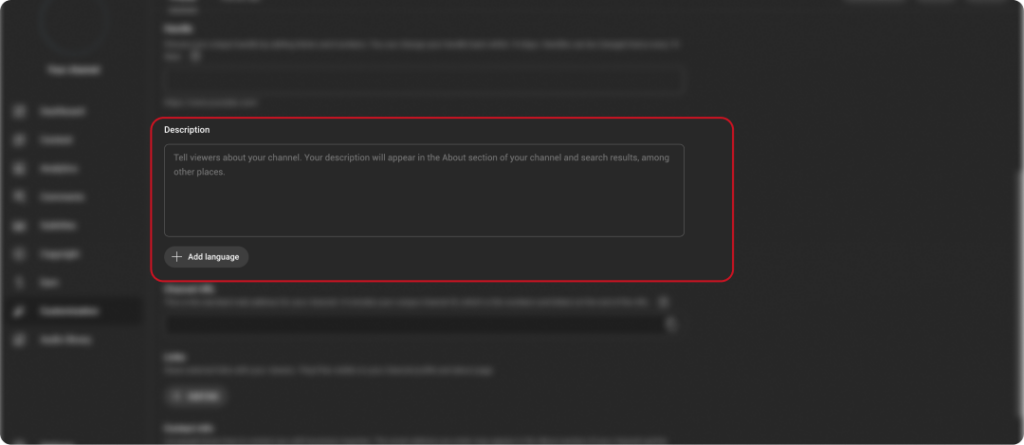
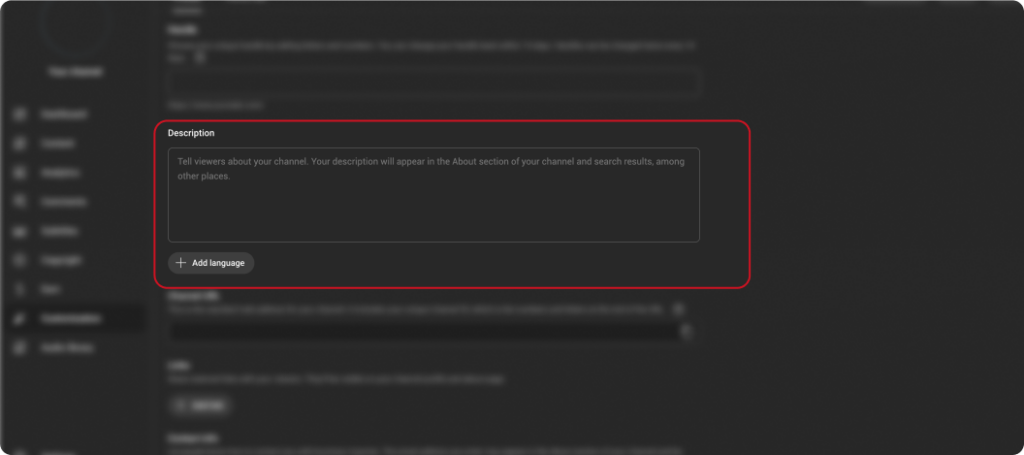
Description Section: Write a short description about what viewers can expect from your content.
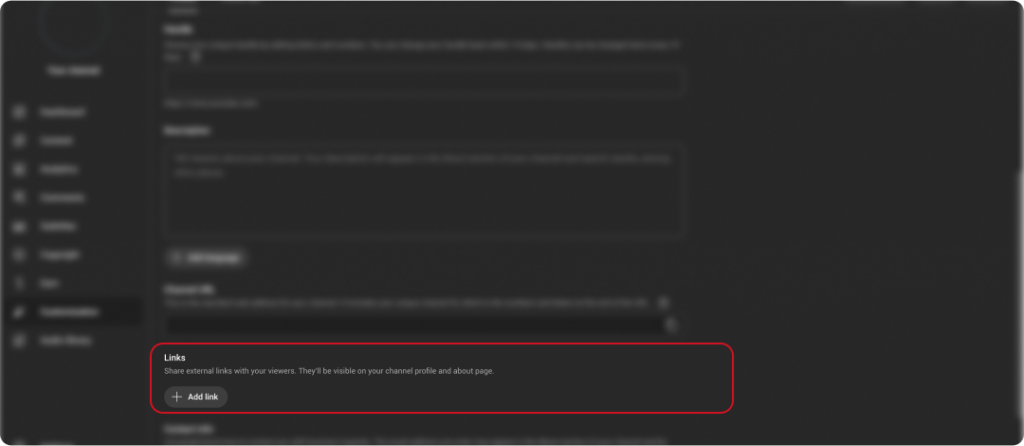
Adding links to your sites – this can include custom links to a website or blog as well as social links to Instagram or Twitter.
Well done! You’ve just created a new YouTube channel!
Next, we'll flesh out all the information and create some channel art to make your page truly stunning.
*You can cancel your subscription anytime*
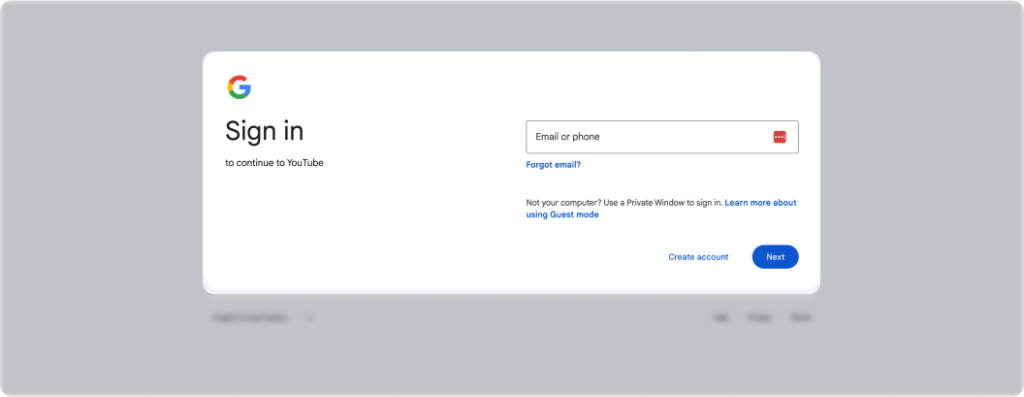
If you don’t already have a Google account set up, you’ll need to create one first. To do this, follow these steps:

Here are five enhancements you can make to increase your chances of having a successful YouTube channel.
1. Optimize your description
YouTube provides a space on your channel to write a little about your brand and the content you share on YouTube. Maximum characters for the description are 1,000, so you have a little room to be creative.
Consider that the words in your channel description don’t just appear on your channel page – they can also boost your YouTube SEO. They are indexed by search engines and can be featured across YouTube in suggested channel categories and YouTube search results. A wise tactic is to include some relevant keywords and CTAs within the opening lines of your description.
2. Add links to your channel
As mentioned earlier in this post, you can have up to five links appear in your channel’s banner. The first link will appear expanded, and the remaining links will be shown as icons.
You can add these links in four super-quick steps:
Click the “Customize Channel” button on your channel’s homepage.
Then click on the gear icon in the upper-right corner, just beneath your cover art.
You’ll see a Channel Settings lightbox appear. Here, you need to toggle on the option labeled “Customize the layout of your channel”.
Now that you’ve enabled customizations on your channel, return to your channel homepage and you’ll now see the option to “Edit Links” under the settings menu on your channel art.

3. Add a channel trailer
A decent channel trailer can be a great way to introduce people to your content. A channel trailer should grab attention as soon as it starts and give a clear idea of the type of content you create on YouTube.
4. Add your contact details (email address)
If you’re using YouTube as a business or a creator, it can be great to have your contact details handy for easy discoverability for anyone who is interested in your work.
5. Utilize the YouTube channel art platform
The YouTube channel art platform is a great place to showcase your brand’s personality and express more about your business to your audience.
Unravel the process of launching a YouTube channel for your company with our complete guide which includes initial setup, cover art creation, and profile customization.
1. Log into YouTube
Kickstart the process of establishing your YouTube channel by logging into YouTube through your Google Account.
2. Navigate to YouTube Settings
Upon successful login, direct your cursor to your profile icon located at the top right corner of the screen and click on the ‘Create a channel’ option.
3. Set Up Your Channel
Decide whether you want to create a personal channel or design it under a company or a unique name. Personalize your channel by adding a profile picture, writing a description, and inserting links to your business website or social media accounts.
If you don’t possess a Google account, head over to YouTube.com and follow the on-screen instructions to create your Google account. Once you’ve created your Google account, you’re all set to create your YouTube channel.
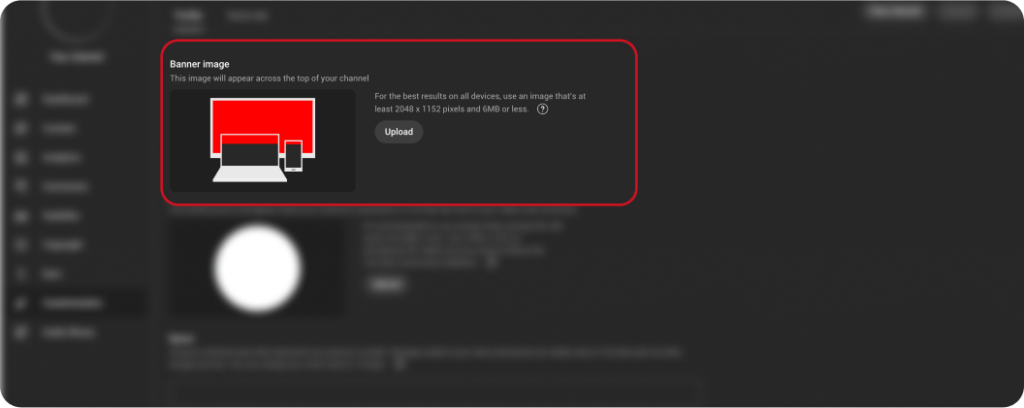
The significance of YouTube channel art in defining your brand cannot be stressed enough. Utilize an image of 2560 x 1440 pixels for the best output. Make sure your text and emblems are within the safe area to prevent it from getting cropped out on different screens.
To inject channel art into your profile, click on the ‘Customize Channel’ button present on your channel’s homepage. You can either upload your personalized channel art or choose from YouTube’s preset design library. Readjust the cropping of the image to make it appear aesthetically pleasing on various devices.
Enhance your channel description, incorporate links in your channel banner, design a channel trailer to exhibit your videos, and provide your contact information for business-related interactions.
Setting up a YouTube channel paves the way for brand expansion by reaching out to a broad audience. Abiding by the aforementioned steps and suggestions will help you establish an engaging and professional YouTube channel for your enterprise.
Setting up a YouTube channel paves the way for brand expansion by reaching out to a broad audience. Abiding by the aforementioned steps and suggestions will help you establish an engaging and professional YouTube channel for your enterprise.
Step 1: Launching Your YouTube Channel – With or Without a Google Account
Whether you’re Google-equipped or not, setting up your YouTube channel is a breeze. With your account in place, creating a channel is as easy as a few clicks. Without one, you’ll need to establish a Google account first. Once done, you’re ready for the next phase.
Step 2: Adding Spunk to Your Channel with Art and Icons
Creating the perfect YouTube channel involves more than just posting content – appearance matters! This stage introduces you to YouTube channel art, an essential piece of your branding puzzle. You’ll learn how to add a channel icon to match. Tools like Canva or Adobe Express can enhance your channel’s visual appeal and we’ll teach you how to utilize these to their full potential.
Step 3: Optimizing Your Channel and Adding Final Touches
The final phase is all about customizing and optimizing your channel. Here, you’ll learn how to tailor your channel to resonate with your audience, including optimizing your channel art, adding relevant links, creating an engaging channel trailer, and including your contact details.
In the YouTube realm, SEO and channel descriptions are not to be underestimated. Our guide explains how to use keywords effectively for better YouTube SEO and how to craft attention-grabbing channel descriptions.
Expect handy references to related articles on utilizing video editing software and the wonders of YouTube Studio.
Syllaby can be a game-changer for YouTube Faceless Channels. It’s more than just a tool; it’s a trusted partner that brings expertise and clarity to your video creation process. By staying on top of trends and delivering analytical insights, Syllaby ensures your content is always relevant and impactful. With its professional yet relatable voice, Syllaby understands your challenges and supports you like a good coach, offering clear and concise solutions. Syllaby transforms the complex into the simple, making viral video creation a breeze. Trust in Syllaby to elevate your YouTube Facele Channel with smart, supportive, and straightforward solutions.
Syllaby, a 5-in-1 digital marketing powerhouse tool, harnesses AI to simplify viral video creation. It aids in ideation, scheduling, scripting, and even avatar-based video production with it’s stand-alone video editor, streamlining your marketing journey.
YouTube optimization is crucial because it helps your videos reach the right audience, improve search rankings, and increase engagement. This, in turn, grows your subscriber base and boosts watch time.
Syllaby offers tools like faceless video creation, dynamic thumbnail generation, and engaging subtitle animations. These features save you time and help you focus on high-impact tasks, maximizing your YouTube presence.
The key steps include optimizing your channel profile and branding, creating eye-catching thumbnails, setting up effective keywords, and using tools like Syllaby for endless content ideas.
Pay attention to branding elements like your profile picture, banner, and description. Use tools like Canva or Syllaby's built-in design features to create visually appealing images. Add relevant keywords to help YouTube understand your content.
Use Syllaby’s thumbnail creation tool to design optimized thumbnails without leaving the platform. The tool lets you generate multiple thumbnails for testing, helping you discover what resonates best with your audience.
Add primary keywords to your channel’s backend settings, focusing on terms that align with your target audience. This makes it easier for YouTube to recommend your content to interested viewers.
Syllaby's built-in AI tool suggests relevant video topics based on your niche. It offers trending ideas that can help you tap into popular subjects, boosting your channel's visibility.
Syllaby's subtitle animations enhance viewer engagement by making your videos more dynamic. Effects like fade-in and pop-up grab attention without disrupting the viewing experience.
Syllaby’s faceless video tool creates high-quality, long-form videos without the need for on-camera presentations. This is ideal for maintaining consistency and building watch hours on your channel
Creating playlists organizes content for your audience and keeps them engaged by offering related videos in succession. Syllaby’s AI-driven tools help build curated playlists and test different thumbnails to maximize click-through rates.
Credits are charged as follows:
Idea Discovery: 15 credits per idea generated.
Avatar Video: 50 credits per 1-minute video.
Faceless Video: 13 credits per 1-minute video.
Note: Charges are based on whole minutes. For example, a video that is 5 minutes and 13 seconds will be charged as 6 minutes (6 x 13 = 78 credits). While we strive for accuracy, there may be slight discrepancies in calculations.
Image Regeneration: The first 3 regenerations are free; each additional regeneration costs 1 credit.
Thumbnail Generation: 1 credit for every 3 thumbnails generated.
Script Generation: Each one-minute AI script costs 1 credit.
Exporting an Avatar Video: 6 credits for every 1 minute of video.
Exporting a Faceless Video: There is no charge for exporting after editing.
Step into the future of limitless visual storytelling with Syllaby’s generative character tools. Craft cinematic adventures with virtual personalities and bring your vision to life, no face required!
Have you already clicked?